
How to Conquer Bring Back The Sun All Maps: A Complete Roblox Guide
Master every stage in Roblox's Bring Back The Sun. Learn gem locations, wand mechanics, and strategies for all maps to defeat the mischievous mouse.
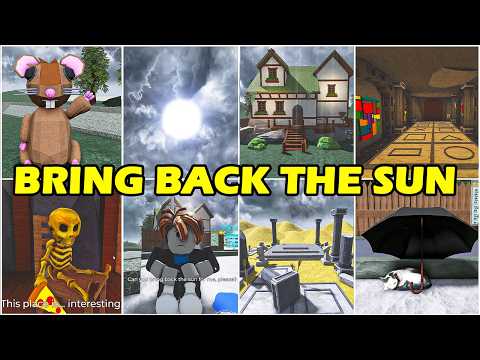 Community walkthroughMaster every stage in Roblox's Bring Back The Sun. Learn gem locations, wand mechanics, and strategies for all maps to defeat the mischievous mouse.YouTube
 Roblox has always been a hub for creative, whimsical, and challenging platformers, and the latest sensation is no exception. If you are looking to conquer Bring Back The Sun all maps, you have come to the right place. This vibrant game combines fast-paced obby mechanics with puzzle-solving elements that will test your reflexes and your wits. In this comprehensive guide, we will break down the secrets of Bring Back The Sun all maps to help you restore the beautiful weather and defeat the mischievous thief who ruined a perfect day.
The game starts with a peaceful, sunny afternoon that is suddenly interrupted. A mysterious, magic-wand-wielding mouse decides to steal the sunshine, leaving the world drenched in a relentless downpour. To fix this, you must embark on a journey across multiple distinct environments, collecting hidden gems, unlocking secure safes, and mastering your platforming skills. Let us dive into the core mechanics, level layouts, and strategies you need to succeed.
Understanding the Core Gameplay and Story
At its heart, this game is a quest to retrieve a stolen magic wand and the elemental gems that keep the world bright. According to player experience, the narrative unfolds through brief, humorous character interactions. You learn that a crazy mouse has taken the magic wand, causing the sky to turn grey and rainy.
To combat this, players must navigate through various zones to find elemental gems. The characters in the game warn you that these gems must be protected at all costs. One character even mentions keeping their gem locked safely inside a passcode-protected safe.
As you travel through the game, you will use the official Roblox platform to join friends, compare high scores, and unlock unique cosmetics. The main loop involves exploring, solving minor environmental puzzles, and completing obby stages to secure these precious gems before the mouse can claim them all.
Complete Breakdown of All Maps
Successfully navigating Bring Back The Sun all maps requires a keen eye for hidden paths and quick platforming reflexes. The game features several distinct zones, each with its own aesthetic, hazards, and layout.
Below is an overview of the primary maps you will encounter during your adventure:
| Map Name | Difficulty | Primary Hazard | Key Objective |
|---|---|---|---|
| Green Meadows | Easy | Slippery grass, basic jumps | Retrieve the first green gem |
| Rainy Canopy | Medium | Falling raindrops, moving leaves | Navigate the treetops to find the safe key |
| Deep Caverns | Medium-Hard | Dark corridors, falling stalactites | Solve the pressure plate puzzle |
| The Final Safehouse | Hard | Laser grids, moving platforms | Defeat the mouse and reclaim the wand |
Green Meadows
This is the starting zone where players learn the basic controls. The sun has just disappeared, and the rain is starting to fall. Your main goal here is to get familiar with the movement physics. Look out for glowing green checkpoints and follow the path toward the giant oak tree, where the first gem is rumored to be hidden.
Rainy Canopy
In the Rainy Canopy, verticality becomes your main challenge. You will need to bounce on mushrooms and climb slippery vines. The rain makes certain surfaces slicker than usual, meaning you must time your jumps carefully. Community reports suggest staying near the trunk of the trees to avoid the heavy rain gusts that can push you off the platforms.
Deep Caverns
Things get dark and mysterious once you enter the Deep Caverns. Here, you will need to find light sources to guide your way. Watch out for glowing blue crystals, as they often mark safe paths. The primary challenge here is a sequence of timed pressure plates that open the door to the hidden safe.
The Final Safehouse
This is the ultimate test of your skills. The mouse has set up a series of traps to keep you away from the magic wand. You will face laser grids, disappearing blocks, and a final chase sequence. Keep your cool, memorize the patterns, and remember to use your checkpoints wisely.
Gem Locations and Safe Codes Guide
When exploring Bring Back The Sun all maps, players must adapt to changing environments and weather patterns. The central objective of each map is to secure the elemental gem before the mouse does. However, these gems are not just lying around in the open; they are locked away in heavy iron safes.
To open these safes, you must locate hidden keys or decipher three-digit codes scattered around the environment. Here is a guide to the gems and how to unlock them:
| Gem Color | Map Location | Unlock Method | Safe Code Hint |
|---|---|---|---|
| Emerald Green | Green Meadows | Find the hidden key behind the waterfall | No code required (Key unlock) |
| Sapphire Blue | Rainy Canopy | Decipher the code written on the wooden signs | Look for the numbers painted on the trees |
| Ruby Red | Deep Caverns | Complete the timed torch puzzle | The order of the lit torches |
| Amethyst Purple | The Final Safehouse | Defeat the mini-boss guard | Drop key from the boss |
When searching for the Sapphire Blue gem, pay close attention to your surroundings. Player experience indicates that the three numbers for the safe code are hidden in plain sight. One is painted on the back of a large rock, the second is carved into a tree trunk, and the third is visible only when you climb to the highest branch of the canopy.
Once you have the code, enter it into the safe's keypad to retrieve the gem. Remember the warning from the in-game characters: protect the gems at all costs, because the mouse is always watching and waiting for an opportunity to snatch them.
Wand Upgrades and Magic Abilities
A key aspect of mastering Bring Back The Sun all maps is understanding how your magic wand interacts with the environment. Once you retrieve the wand during the later stages of the game, you can upgrade its capabilities using the coins you collect along the way.
Upgrading your wand grants you special abilities that make navigating the maps much easier. These upgrades are essential for tackling the harder difficulty settings and achieving speedrun records.
| Wand Tier | Upgrade Cost | Special Ability | Best Map Usage |
|---|---|---|---|
| Basic Wand | Free (Default) | Clears small rain clouds | Green Meadows |
| Spark Wand | 150 Coins | Double jump boost | Rainy Canopy |
| Glow Wand | 350 Coins | Illuminates dark areas | Deep Caverns |
| Sunlight Wand | 600 Coins | Temporary invincibility shield | The Final Safehouse |
The Spark Wand is highly recommended for the Rainy Canopy stage. The double jump boost allows you to bypass some of the more frustrating leaf-hopping sequences entirely.
Meanwhile, the Glow Wand is almost a necessity for the Deep Caverns, as it creates a wide radius of light around your character, revealing hidden traps and invisible pathways that would otherwise result in a quick reset.
How to Defeat the Mischievous Mouse
The climax of your adventure takes place in the Final Safehouse, where you must confront the mouse who stole the sunshine. This boss fight is divided into three distinct phases, each requiring a different strategy.
To help you track your progress across Bring Back The Sun all maps, we have compiled a detailed breakdown of the boss encounters:
| Boss Phase | Mouse Attack Pattern | Player Counter-Strategy | Recommended Wand |
|---|---|---|---|
| Phase 1 | Throws explosive cheese wheels | Jump over the rolling projectiles | Spark Wand (for high jumps) |
| Phase 2 | Summons localized rain storms | Stand on the glowing sun tiles | Basic Wand (to clear clouds) |
| Phase 3 | Charges directly at the player | Dodge and lure the mouse into the safe | Sunlight Wand (for shield protection) |
During Phase 1, the mouse will stand on a high ledge and hurl explosive cheese wheels down at you. These wheels roll along the ground and bounce off the walls. The key to surviving this phase is to keep moving. Do not stay in one spot for too long, and use your double jump to clear the obstacles.
In Phase 2, the arena will start to flood. The mouse will summon heavy rain clouds that drain your health if you stand under them. Look for the glowing golden sun tiles on the floor. Standing on these tiles protects you from the rain and charges your wand. Once your wand is fully charged, blast the mouse to initiate the final phase.
Phase 3 is a test of agility. The mouse will grow in size and charge directly at you. You cannot damage the mouse directly in this phase. Instead, you must position yourself in front of the open safe at the back of the arena. When the mouse charges, dodge at the very last second. The mouse will crash into the safe, locking itself inside and dropping the magic wand.
Whether you are playing solo or with friends, completing Bring Back The Sun all maps is an incredibly rewarding experience. By mastering the platforming mechanics, utilizing your wand upgrades, and keeping your gems locked away safely, you will easily bring the sunshine back to this colorful world.
Frequently Asked Questions
How many stages are featured in Bring Back The Sun all maps?
Currently, the game features four main maps: Green Meadows, Rainy Canopy, Deep Caverns, and The Final Safehouse. Each map presents unique challenges, environmental hazards, and puzzles that players must solve to progress.
What is the best strategy for finding safe codes?
The safe codes are hidden throughout the environment. Look for numbers painted on walls, carved into trees, or revealed by solving light puzzles. If you are struggling, community reports suggest checking the corners of the map or looking at the environment from a higher vantage point.
Can I play Bring Back The Sun with friends?
Yes! The game supports multiplayer lobbies. Playing with friends can make solving puzzles easier, as you can coordinate to find keys, share safe codes, and distract the boss during the final encounter.
Related Guides
Bring Back The Sun How to Play: The Ultimate Guide to Solving Puzzles and Finding Relics
Learn Bring Back The Sun how to play with our comprehensive guide. Master puzzles, find all four relics, and break the wizard's rain curse today!
Mastering the Bring Back The Sun Escape Room: Full Walkthrough, Puzzle Codes, and Map Guide
Navigate the Bring Back The Sun escape room on Roblox with our comprehensive guide. Find puzzle codes, map sequences, and tips to collect all four relics.
Roblox Bring Back The Sun Full Game Guide: How to Find All Relics
Master the Bring Back The Sun full game on Roblox. Learn puzzle solutions, relic locations, and strategies to end the endless rain curse.
Top 10 Bring Back The Sun Similar Games for Puzzle and Adventure Lovers
Discover the best Bring Back The Sun similar games. Explore top atmospheric puzzle-platformers, whimsical co-op adventures, and physics-based indie hits.