
Bring Back The Sun Jail Walkthrough: The Ultimate Escape Guide
Master the Jail map in Roblox's Bring Back The Sun with our step-by-step walkthrough. Solve all puzzles, find keys, and escape easily.
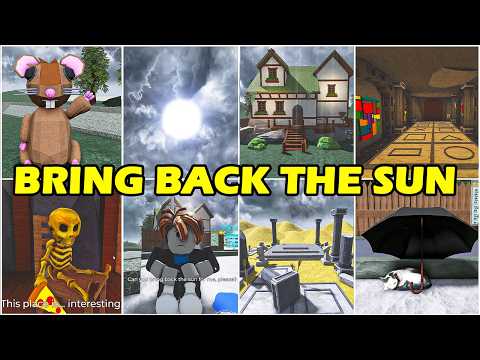 Community walkthroughMaster the Jail map in Roblox's Bring Back The Sun with our step-by-step walkthrough. Solve all puzzles, find keys, and escape easily.YouTube
 Roblox players looking for a challenge have found a brilliant match in the newly released prison-themed map. If you are struggling to escape the dark corridors of this level, this comprehensive Bring Back The Sun jail walkthrough is exactly what you need to succeed. Finding your way through these puzzle-filled cells requires keen observation and quick thinking.
In this guide, we will break down every single step, from the initial cell breakout to the final safe combination. By following this detailed Bring Back The Sun jail walkthrough, you will easily bypass the complex puzzles, locate all the hidden keys, and restore light to this gloomy dungeon in no time.
To play the game and test these strategies yourself, you can access the experience directly on the official Roblox gaming platform. Let's dive into the step-by-step solutions for each room.
Escaping the Starting Cell
Your journey begins inside a locked prison cell. The room is sparse, containing only a few interactive objects. To escape, you must locate a heavy rock lying on the floor.
Pick up this rock and aim it toward the large red button on the floor near the cell gate. Throw the rock directly onto the button to trigger the mechanism. The gate will slide open, allowing you to access the main corridor.
Initial Room Checklist
| Step | Action | Target Object | Outcome |
|---|---|---|---|
| 1 | Locate Rock | Ground | Adds rock to inventory |
| 2 | Aim at Button | Floor Plate | Prepares throw trajectory |
| 3 | Throw Rock | Red Button | Opens cell gate |
Once you cross the threshold of your cell, the real challenge begins. The corridor leads to a room featuring a mysterious gemstone puzzle on the wall.
Solving the Gemstone Wall Puzzle
In the next area, you will encounter a wall puzzle featuring five distinct light fixtures (lints) and five colored gemstones. To open the next door, you must color-code these lints in the correct sequence.
The clue lies in analyzing the gemstone layout. On the left side of the room, you will notice two green gemstones. On the right side, there is one blue gemstone.
However, player experience reports indicate that the colors are actually inverted. For instance, the blue gemstone is located on the top right, but its corresponding light is on the top left.
To solve this, set the two leftmost lints to green. Set the rightmost lint to blue. For the middle two lints, apply the inverted logic: one will be red, and the other will be yellow/orange.
Gemstone Color Configurations
| Lint Position | Target Color | Logic |
|---|---|---|
| Far Left | Green | Direct Match |
| Middle-Left | Green | Direct Match |
| Center | Red | Inverted Match |
| Middle-Right | Yellow/Orange | Inverted Match |
| Far Right | Blue | Inverted Match |
Inputting all five colors correctly will trigger the door mechanism, allowing you to progress to the next puzzle room.
Feeding the Fish and Decoding the Wardrobe
Inside the newly opened room, you will find a hungry fish in a tank and a locked wardrobe. To get the wardrobe code, you must first feed the fish.
Look around the room for a skeleton lying on the floor. Interact with the skeleton to collect a bone. Take this bone to the mortar and pestle station in the corner of the room. Crush the bone to create bone meal.
Next, find the potted plant in the room. Use the bone meal on the plant to make it grow rapidly, producing a "tasty plant" in your inventory. Feed this tasty plant to the fish.
The fish will thank you by revealing a mathematical riddle: the code to the wardrobe is the total number of books on the floor multiplied by 10.
Wardrobe Code Calculation
| Metric | Value |
|---|---|
| Total Books on Floor | 18 |
| Multiplier | 10 |
| Final Wardrobe Code | 180 |
Type "180" into the wardrobe lock. Inside, you will find a yellow key and a magic wand. Collect both items immediately. Use the yellow key to open the nearby locked door, which triggers a brief story cutscene.
The Magic Wand, Green Torch, and Hidden Spell
After the cutscene ends, enter the newly unlocked room. On the desk, you will find a book. Read the left page, which states: "Green torches reveal text the bare eyes can't see."
Pick up the green torch nearby and equip it. Walk over to the empty wall space and shine the green light. A hidden message will appear on the wall: "Hey you must be someone who's not a wizard. Well, you will never find out what the word hayfly is."
The magic word is "hayfly". Equip your magic wand, open the spell input box, and type the word exactly as written.
Spell and Key Progression
| Item Needed | Action | Result |
|---|---|---|
| Green Torch | Shine on wall | Reveals secret word "hayfly" |
| Magic Wand | Type "hayfly" | Makes hay pile float in the air |
| Floating Hay | Search underneath | Reveals a door knob |
| Computer | Search underneath | Reveals a green key |
Collect both the door knob and the green key. Head to the door lacking a handle, attach the door knob, and use the green key to unlock it.
Forging the Crafted Cube
Before tackling the puzzles inside the next room, return to the book you read earlier and read the right-hand page. It states that you need to forge a special item using four pieces of coal and two steel pieces.
Search the room thoroughly to find these materials. Some materials are hidden behind objects or require specific tools to extract.
Resource Location Guide
| Material | Quantity | Location | Tool Required |
|---|---|---|---|
| Coal | 2 | Hidden in room corners | None (Pick up) |
| Coal | 2 | Inside dark deposits | Axe (Mine deposit) |
| Steel | 1 | Floor near the wall | None (Pick up) |
| Steel | 1 | Hidden in ceiling rock | Pickaxe / Mine ceiling rock |
Note that the steel piece on the ceiling can be tricky to grab. Community reports suggest climbing onto the nearby safe to get a better camera angle and reach the ceiling rock easily.
Once you have gathered all four coals and two steel pieces, place them into the hot furnace. The furnace will melt the materials down and output a "Crafted Cube".
Deciphering the Safe Code and Escaping the Jail
Take the Crafted Cube and place it under the desk lamp in the center of the room. The light will project hidden numbers onto the sides of the cube.
To read these numbers in the correct order, consult the note nearby, which mentions a sequence of directions: "Front, Left, Back, Right." Rotate the cube under the lamp to read the numbers corresponding to these directions.
Cube Direction to Code Translation
| Cube Face | Number |
|---|---|
| Front | 1 |
| Left | 9 |
| Back | 3 |
| Right | 6 |
This sequence gives you the final combination: 1936. Walk over to the safe in the corner of the room and input the code. Press the confirm button to open the safe and claim the door crystal.
Take the door crystal to the final exit door and place it into the designated slot. The heavy security door will open, completing the Jail map.
Frequently Asked Questions
What is the wardrobe code in the Bring Back The Sun jail walkthrough?
The wardrobe code is 180. You calculate this by counting the 18 books scattered on the floor and multiplying that number by 10, as hinted by the fish.
How do you get the steel piece from the ceiling?
To grab the ceiling steel, you must first mine the glowing rock on the roof. Since it is high up, climb onto the top of the safe to adjust your camera angle and reach the item.
What spell do you need to write with the magic wand?
The spell you need to type is "hayfly". You can discover this secret word by shining the green torch on the wall to reveal the hidden wizard text.
Related Guides
Bring Back The Sun Ancient Ruins Walkthrough: Full Guide & Puzzle Solutions
Stuck on the Ancient Ruins map in Roblox Bring Back The Sun? Follow our comprehensive walkthrough to solve the puzzles and clear the stage.
Bring Back The Sun Restaurant Walkthrough: Complete Guide to Solving Every Puzzle
Stuck on the Restaurant map? Follow this comprehensive Bring Back The Sun restaurant walkthrough to collect all items, solve the codes, and finish the level.
Complete Bring Back The Sun Wizard Castle Walkthrough: Master the Darkness
Master the Wizard Castle in Bring Back The Sun with our comprehensive walkthrough. Learn puzzle solutions, hidden secrets, and platforming tips.
The Ultimate Bring Back The Sun Lava Temple Walkthrough: Every Puzzle Solved
Master the final map with our Bring Back The Sun lava temple walkthrough. Get the door codes, flame colors, and statue solutions to beat the game.