
Cracking the Bring Back The Sun Lava Temple Code: A Complete Roblox Puzzle Guide
Stuck in the Lava Temple? Learn how to solve every puzzle, including the Bring Back The Sun lava temple code, torch patterns, and statue orientations.
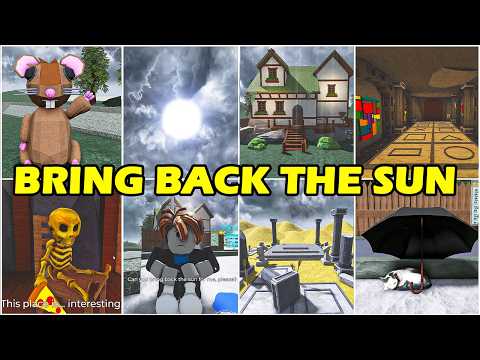 Community walkthroughStuck in the Lava Temple? Learn how to solve every puzzle, including the Bring Back The Sun lava temple code, torch patterns, and statue orientations.YouTube
 Navigating the Heat of the Lava Temple
Roblox has always been a hub for creative and challenging escape-room-style games, but few have captured the community’s attention quite like "Bring Back The Sun." As players reach the final stages of the game, they encounter the most formidable map yet: The Lava Temple. This level is notorious for its intricate logic puzzles and high-stakes environment. Finding the Bring Back The Sun lava temple code is the primary hurdle that stops many players in their tracks, preventing them from reaching the climactic boss encounter.
To progress through this molten fortress, you must master a series of symbol-based equations, color-matching sequences, and environmental interactions. Whether you are a veteran of Roblox obbies or a newcomer to the puzzle genre, the complexity of the Lava Temple requires a keen eye for detail and a solid understanding of the game's internal logic. In this guide, we will break down every step necessary to find the Bring Back The Sun lava temple code and secure your victory.
The First Challenge: Breaking the Glass
Upon entering the Lava Temple, your first objective isn't immediately obvious. The room is filled with cryptic symbols and locked mechanisms. According to player experience, the very first thing you need to do is locate a loose rock scattered on the floor. This rock is your primary tool for interacting with the environment in the early stage of the map.
Once you have the rock, look for a specific pane of glass that appears different from the others. Breaking this glass reveals a hidden set of symbols. However, the game provides a massive array of symbols, most of which are decoys. To narrow down your search, you must consult the "Yellow Book" found nearby. The book contains a crucial clue: "Yellow means okay, follow." This instruction tells you to trace the yellow line provided in the book's diagram to identify which symbols are actually part of the sequence.
Identifying the Target Symbols
Based on the yellow path, you will identify five specific symbols that form the basis of the temple's security system. The sequence consists of three symbols on the top row and two on the bottom. Community reports confirm that these symbols are generally consistent across playthroughs, though the values assigned to them may shift.
| Symbol Position | Symbol Type |
|---|---|
| First (Top) | Circle |
| Second (Top) | Triangle |
| Third (Top) | Rectangle |
| Fourth (Bottom) | Triangle |
| Fifth (Bottom) | Cross |
Decoding the Math: Finding the Values
After identifying the symbols, you need to translate them into numbers. This is where the Bring Back The Sun lava temple code logic truly begins. Near the symbol wall, there is a lever. Pulling this lever reveals the "base values" for the level's variables. These variables are represented by Greek letters or alphanumeric codes, such as Pi, Delta, and T6.
The game requires you to perform basic arithmetic to find the final digit for each symbol. For example, if the book states that a Triangle is equal to the sum of two other variables, you must add those values together to get the code fragment.
Base Variable Values
Before you can solve the equations, you must note the values provided by the lever. While these can occasionally vary in different game versions, the standard values observed by the community are as follows:
| Variable Name | Assigned Value |
|---|---|
| Pi (π) | 2 |
| Delta (Δ) | 9 |
| Zero (0) | 1 |
| T6 | 8 |
Calculating the Final Code
Now that you have the base numbers, you can apply them to the symbol equations found in the temple's reference book. This step is where most players get stuck, as missing a single calculation will result in an incorrect Bring Back The Sun lava temple code.
- Circle: The book indicates that the Circle is equal to Pi. Therefore, the value is 2.
- Triangle: The equation for the Triangle is Pi + Delta. Adding 2 + 9 gives you 11.
- Rectangle: The Rectangle is directly tied to the T6 variable, which is 8.
- Cross: The Cross is equal to the Zero variable, which is 1.
When you string these together in the order identified by the yellow path (Circle, Triangle, Rectangle, Triangle, Cross), you get the full sequence: 2 - 11 - 8 - 11 - 1. Inputting this as 2118111 into the keypad will unlock the next chamber.
The Torch and Glass Pattern Puzzle
Once you have successfully entered the Bring Back The Sun lava temple code, you will find yourself in a room filled with torches and stained-glass patterns. This puzzle is a test of observation. You will see several panes of glass, most of which have a consistent pattern, but each one has a specific "missing" color in a different quadrant.
Your goal is to change the color of the flames in the room to match the colors that are missing from the corresponding glass panes. This requires you to look at the "complete" pattern and identify what is absent in the broken or blank sections.
Color Mapping Guide
Players have identified a pattern that typically follows this logic:
| Torch Location | Missing Quadrant | Required Flame Color |
|---|---|---|
| Torch 1 | Below Yellow | Orange |
| Torch 2 | Bottom Left | Purple |
| Torch 3 | Next to Yellow | Yellow |
| Torch 4 | Top Left | Yellow |
Changing all four torches to their correct colors will trigger the door to open, allowing you to collect a key. This key is essential for the next platforming section, as it unlocks a locker containing pliers. You can learn more about the mechanics of these types of puzzles on the official Roblox platform, where developers often share insights into game logic.
The Pliers and the Bridge
With the pliers in hand, you must navigate a short but dangerous "obby" (obstacle course). The goal here is to reach a high balcony where a thick rope holds up a drawbridge. Use the pliers to cut the rope. This action drops the bridge, creating a path across the lava pit that was previously impassable.
Community members often suggest doing this part quickly, as the Lava Temple environment is designed to be visually distracting. Once the bridge is down, cross over and hit the button on the left wall to enter the final puzzle room before the boss area.
The Color Canvas and the Statues
The final room contains two distinct puzzles that must be solved in tandem. The first involves a blank canvas and a sequence of colors: Red, Blue, Green, and Yellow. You will see these colors flash in specific positions on a nearby display. You must memorize both the order and the position of these colors.
Canvas Sequence Reference
| Sequence Step | Color | Position on Grid |
|---|---|---|
| 1 | Red | Top Middle |
| 2 | Blue | Bottom Center |
| 3 | Green | Top Right |
| 4 | Yellow | Bottom Right |
After successfully clicking the colors on the canvas in the right order, the spider webs covering the nearby statues will dissolve. This leads to the final mechanical puzzle of the temple.
The Statue Alignment
A poster on the wall provides the final clue: "All statues must face the center." There are several statues surrounding the central dais. You must click each statue to rotate it until it is looking directly at the middle of the room. When the last statue is aligned, the path to the end of the level—and the impending boss fight—will finally be revealed.
Community Tips for Success
The Lava Temple is widely considered the hardest map currently available in "Bring Back The Sun." Based on player experience gathered from social media and gaming forums, here are a few additional tips to keep in mind:
- Brightness Settings: Some of the symbols and colors (especially the difference between yellow and orange flames) can be hard to see. Turning up your in-game brightness or adjusting your monitor settings can make the torch puzzle much easier.
- Teamwork: If you are playing in a server with others, have one person stand by the math lever while another stands by the symbols. This prevents you from having to run back and forth to verify the Bring Back The Sun lava temple code variables.
- Recording the Sequence: The color canvas puzzle flashes its sequence quickly. If you have trouble remembering the positions, use your phone to record a quick video of the screen so you can play it back while clicking the canvas.
Final Thoughts on the Lava Temple
Completing the Lava Temple is a badge of honor for any Roblox player. It combines math, logic, observation, and platforming into a single cohesive experience. By following the steps to decode the Bring Back The Sun lava temple code, matching the torch colors, and aligning the statues, you will successfully navigate the final map and prepare yourself for the ultimate showdown.
As the game continues to receive updates, keep an eye out for new rooms and boss mechanics that may be added to the Temple. The developers have hinted at even more complex puzzles in future expansions, but for now, you have all the tools you need to bring back the sun.
Frequently Asked Questions
What is the exact Bring Back The Sun lava temple code?
While the logic remains the same, the code is typically 2118111. This is derived from calculating the values of the Circle (2), Triangle (11), Rectangle (8), Triangle (11), and Cross (1) based on the variables provided in the level.
Where do I find the pliers in the Lava Temple?
To find the pliers, you must first solve the torch color puzzle to get a key. Use that key to open a small locker located near the start of the obby section. The pliers are inside and are required to cut the rope that lowers the bridge.
Why aren't the statues moving when I click them?
The statues are initially covered in spider webs, which locks them in place. You must first complete the color canvas puzzle (Red, Blue, Green, Yellow sequence) to clear the webs. Once the webs are gone, you can click the statues to rotate them toward the center of the room.
How do I know which symbols to use for the Bring Back The Sun lava temple code?
You must look at the book in the first room. It contains a diagram with a yellow line. Follow the yellow line to see which symbols it passes through. Only those symbols are part of the final code; all other symbols on the wall are decoys designed to confuse players.
Related Guides
Are There Working Bring Back The Sun Codes? A Complete Guide to Solving Puzzles
Struggling with Bring Back The Sun on Roblox? Discover the truth about Bring Back The Sun codes, level walkthroughs, and expert tips to master the game.
Bring Back The Sun Books List: Roblox Puzzle Guide & Gene Wolfe Series Order
Stuck on the wizard's library puzzle? Discover the complete Bring Back The Sun books list solution for Roblox, plus Gene Wolfe's sci-fi reading order.
Bring Back The Sun Level 3 Code and Walkthrough: Tips to Master the Stage
Stuck on the third stage? Discover the Bring Back The Sun level 3 code, essential strategies, and expert tips to conquer this challenging Roblox puzzle.
Bring Back The Sun Mosaic Code Guide: Restoring Light in Roblox Puzzles
Stuck on the Bring Back The Sun mosaic code? Our comprehensive walkthrough covers every relic, code, and secret in this Roblox escape-room adventure.