
The Ultimate Bring Back The Sun Lava Temple Walkthrough: Every Puzzle Solved
Master the final map with our Bring Back The Sun lava temple walkthrough. Get the door codes, flame colors, and statue solutions to beat the game.
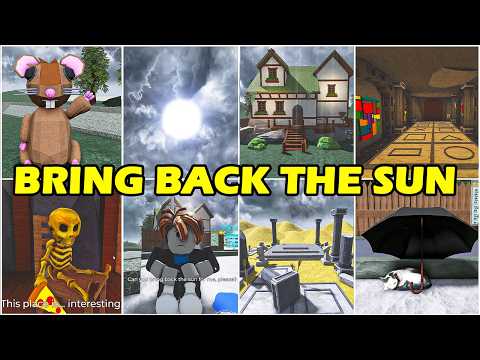 Community walkthroughMaster the final map with our Bring Back The Sun lava temple walkthrough. Get the door codes, flame colors, and statue solutions to beat the game.YouTube
 Navigating the final challenges of a popular Roblox experience can be a daunting task, especially when the difficulty spikes in the endgame. If you have reached the final map of the game, you are likely looking for a comprehensive Bring Back The Sun lava temple walkthrough to help you navigate the complex math and color puzzles. This guide will break down every step, from deciphering cryptic symbols to aligning ancient statues, ensuring you can restore the light without falling into the molten depths.
The Lava Temple is widely regarded by players as the most difficult stage in the game, requiring both sharp observation and logical deduction. By following this Bring Back The Sun lava temple walkthrough, you will save yourself the frustration of trial and error, allowing you to focus on the platforming elements that make this map so intense. Whether you are stuck on the initial symbol code or the final statue alignment, we have the precise solutions you need to progress.
Decoding the First Symbol Puzzle
Upon entering the Lava Temple, your first obstacle is a locked door protected by a numerical keypad. To find the code, you must interact with the environment to gather clues. Start by collecting a rock found near the entrance. Use this rock to shatter the specific glass pane in the room, which reveals a series of symbols. However, not all symbols are relevant; you must consult the nearby book for guidance.
According to the book, the "yellow line" is the path to follow. By tracing the yellow path across the symbol grid, you will identify five specific shapes in a specific order. Community reports suggest that while the layout remains consistent, many players struggle to translate these shapes into numbers. To do this, you must pull the lever in the room to reveal a legend of mathematical values.
Symbol Value Legend
| Symbol Name | Mathematical Variable | Numerical Value |
|---|---|---|
| Pi | $\pi$ | 2 |
| Delta | $\Delta$ | 9 |
| Zero | 0 | 1 |
| T6 | T6 | 8 |
Once you have these base values, you must look at the second page of the book to see how the shapes are calculated. The shapes correspond to the variables you just unlocked. Below is the breakdown of how to calculate the final code based on the yellow path symbols.
Calculating the Keypad Code
| Shape | Formula | Calculation | Final Value |
|---|---|---|---|
| Circle | Pi | 2 | 2 |
| Triangle | Pi + Delta | 2 + 9 | 11 |
| Rectangle | T6 | 8 | 8 |
| Triangle | Pi + Delta | 2 + 9 | 11 |
| Cross | Zero | 1 | 1 |
Following this logic, the sequence of symbols (Circle, Triangle, Rectangle, Triangle, Cross) translates to the code 211 8111. Inputting this into the keypad will grant you access to the next chamber.
The Missing Glass and Flame Puzzle
The second major hurdle in the Lava Temple involves a series of torches and colored glass panes. In this room, you will notice four torches that can change color and several glass windows with missing pieces. The goal is to identify which color is missing from each specific window pattern and match the corresponding torch to that color.
This puzzle relies heavily on pattern recognition. Each window has two blank panes that are part of the static design, but the third blank pane is the one you must solve. By looking at the completed patterns in the room, you can deduce what the missing color should be based on its position relative to the yellow panes.
Torch Color Solutions
| Torch Position | Missing Color Logic | Required Flame Color |
|---|---|---|
| First Torch | Below the Yellow pane | Orange |
| Second Torch | Bottom Left corner | Purple |
| Third Torch | Next to the Yellow pane | Yellow |
| Fourth Torch | Top Left corner | Yellow |
Changing the flames to these specific colors in the correct order will trigger the mechanism to open the next door. If the door does not open, double-check the "Orange" flame, as some players report it can look very similar to the Yellow flame in the game's lighting engine.
Navigation and the Bridge Mechanism
After solving the flame puzzle, you aren't out of the woods yet. You will find a key located in the immediate area. Use this key to unlock a nearby locker, which contains a pair of pliers. These pliers are essential for the next platforming section.
Look for a rope holding up a makeshift bridge. Use the pliers to cut the rope, which will cause the bridge to drop, allowing you to cross the lava pit. Before crossing, you will need to complete a short "obby" (obstacle course) to reach the higher platform. Once you have successfully navigated the jumps and crossed the bridge, press the button on the left side of the wall to open the path to the final puzzle room.
The Color Canvas and Statue Alignment
The final room of the Lava Temple is perhaps the most visually confusing. You will see a blank canvas and a series of colors flashing in a specific sequence: Red, Blue, Green, and Yellow. It is not enough to simply remember the colors; you must also remember the specific quadrant of the canvas where each color appeared.
Player experience indicates that the positions are just as vital as the order. If you click the colors in the right order but in the wrong spots, the puzzle will reset.
Canvas Sequence and Position
| Step | Color | Position on Canvas |
|---|---|---|
| 1 | Red | Top Center/Left |
| 2 | Blue | Bottom Middle |
| 3 | Green | Top Right |
| 4 | Yellow | Bottom Right |
Successfully completing the canvas puzzle will clear the spider webs from the statues surrounding the room. The final task is simple but easy to overlook: every statue must face the center of the room. Click on each statue to rotate it until it is looking directly at the middle. Once the last statue is aligned, the temple is complete.
Pro-Tips for the Lava Temple
To ensure your run is successful, keep these community-sourced tips in mind:
- Check Your Math: In the first puzzle, remember that the Triangle is a sum (Pi + Delta). Many players mistakenly just use the value of Delta.
- Lighting Settings: If you are struggling to distinguish between the Orange and Yellow flames, try turning up your brightness or adjusting your Roblox graphics settings to "Manual" to see the color gradients more clearly.
- Statue Hitboxes: Sometimes clicking the base of the statue is more responsive than clicking the head or torso when trying to rotate them.
- Patience in the Obby: The platforming section after the pliers is small but unforgiving. Take your time with the jumps, as falling into the lava will reset your position to the start of the room.
The Future of Bring Back The Sun
Completing the Lava Temple marks the end of the current map cycle. However, according to developer teasers and community discussions, this is not the absolute end of the journey. A final boss fight is expected to be released in a future update, which will likely take place immediately following the events of the Lava Temple.
Players are encouraged to keep their skills sharp, as the mechanics introduced in this temple—specifically the math-based codes and the color-position puzzles—are likely to reappear in a more high-stakes environment during the final confrontation.
Summary of Key Codes and Solutions
If you are in a rush and just need the quick answers to progress through your Bring Back The Sun lava temple walkthrough, refer to this summary table:
| Puzzle Phase | Solution/Code |
|---|---|
| Initial Keypad | 211 8111 |
| Flame Colors | Orange, Purple, Yellow, Yellow |
| Tool Required | Pliers (found in locker) |
| Canvas Order | Red (Top), Blue (Bottom), Green (Top Right), Yellow (Bottom Right) |
| Final Action | Rotate all statues to face the center |
By mastering these steps, you will successfully navigate the dangers of the temple and be ready for whatever challenges the developers release next.
FAQ: Bring Back The Sun Lava Temple
What is the code for the first door in the Lava Temple?
The code for the first door is 211 8111. This is derived by following the yellow path on the symbol grid and calculating the values of the Circle, Triangle, Rectangle, Triangle, and Cross based on the variables provided by the lever ($\pi=2, \Delta=9, 0=1, T6=8$).
Where do I find the pliers in the Lava Temple?
The pliers are located inside a small locker. To open the locker, you must first solve the flame color puzzle to unlock the room containing the key. Once you have the key, you can collect the pliers and use them to cut the rope that holds up the bridge.
How do I solve the statue puzzle at the end?
The statue puzzle is the final step of the Bring Back The Sun lava temple walkthrough. After clearing the spider webs by completing the color canvas puzzle, you must click on each statue in the room so that they are all facing the center. Once all statues are correctly aligned, the level is complete.
Is the Lava Temple the last level in the game?
As of the current update, the Lava Temple is the final playable map. However, the game concludes with a teaser for an upcoming boss fight. Players who complete the temple have effectively finished all currently available puzzle content.
Related Guides
Bring Back The Sun Ancient Ruins Walkthrough: Full Guide & Puzzle Solutions
Stuck on the Ancient Ruins map in Roblox Bring Back The Sun? Follow our comprehensive walkthrough to solve the puzzles and clear the stage.
Bring Back The Sun Jail Walkthrough: The Ultimate Escape Guide
Master the Jail map in Roblox's Bring Back The Sun with our step-by-step walkthrough. Solve all puzzles, find keys, and escape easily.
Bring Back The Sun Restaurant Walkthrough: Complete Guide to Solving Every Puzzle
Stuck on the Restaurant map? Follow this comprehensive Bring Back The Sun restaurant walkthrough to collect all items, solve the codes, and finish the level.
Complete Bring Back The Sun Wizard Castle Walkthrough: Master the Darkness
Master the Wizard Castle in Bring Back The Sun with our comprehensive walkthrough. Learn puzzle solutions, hidden secrets, and platforming tips.